Besides, EFS can handle all the functions related to connectivity including Cellular Network, Wifi, Bluetooth, IMEI, Network Unlock Information etc. Hence, for any reason, if this EFS data gets corrupted then your device will be completely useless and will no longer be recognized by your carrier. Also, you’ll be not able to make or receive calls, send or receive messages, connect using Wifi, Bluetooth, etc. Your IMEI will become null. There are many reasons because of which your EFS data can get corrupted some of them are listed below:
How to Backup and Restore EFS/IMEI on Android phones
To avoid any unpleasant situations mentioned above, it is necessary to take a complete backup of EFS data. Here, we’ll discuss some easy 10 methods on how to backup and restore EFS on Android phones.
Disclaimer
Try this at your own risk. We’ll not be held responsible if your phone gets damaged by following these methods.
Pre-Requisites
Make sure your Android phone is charged at least up to 60%. Enable USB debugging mode from your mobile settings. Mobile USB drivers must be installed on your computer.
Method 1: Using EFS Professional Tool
At first, we’ll use EFS software on your Windows PC to backup IMEI. Let’s get straight into it.
Requirements
Downloads
EFS Professional tool Busy Box Android App
Steps to backup EFS
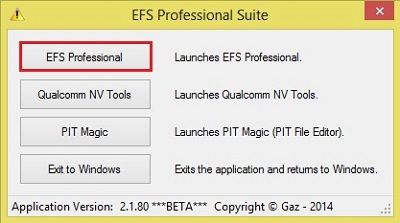
Download and install Busybox App on your phone. Launch it and grant Superuser permissions. On the main screen tap on the Install option. This will install the required files for BusyBox to work. After installation, you’ll see a successful message on the screen. Furthermore, connect your phone to the computer via USB cable. Download and extract the EFS Professional tool on your PC. From the extracted folder, open the EFS Professional.exe file.
Then click on EFS Professional from the popup window.
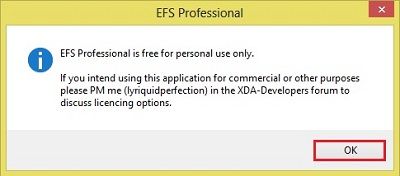
Moreover, click OK on the next popup window.
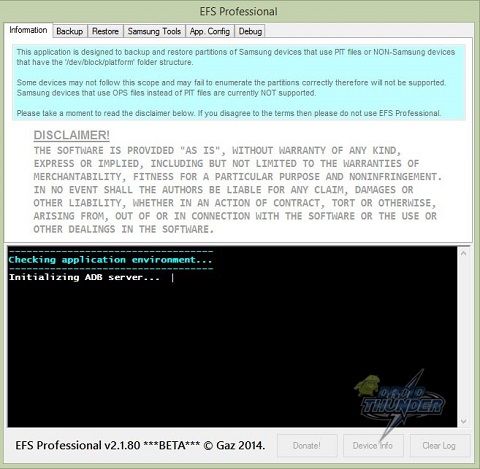
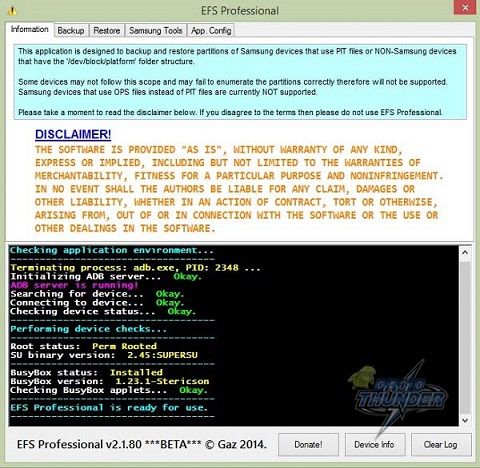
This will launch the EFS Professional tool. It will automatically detect the connected phone.
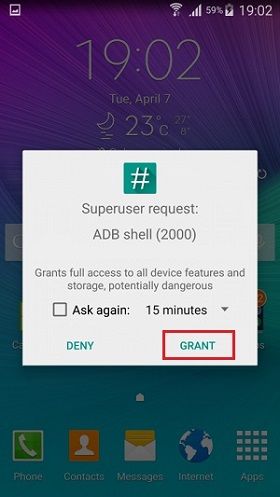
At the same on your phone, a popup window will appear to grant Superuser permission. So grant it.
After successful detection, you’ll see your device status, model number, firmware version, root and busy box version etc.
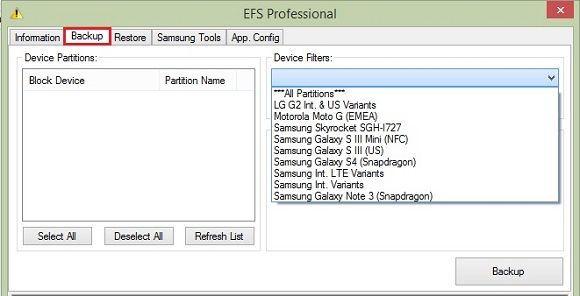
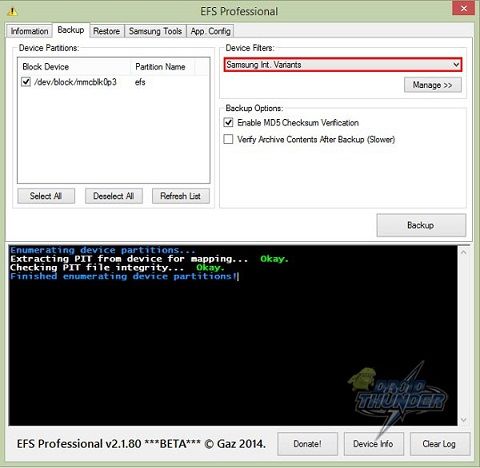
If your computer fails in detecting the device, make sure device drivers are properly installed or not. Now tap on the Backup tap located on the top left corner of the tool. Also, select the type of device under the Device filter option. I’m using the Samsung International variant phone so I’ll select Samsung Int. Variants. If your phone runs on the Qualcomm Snapdragon processor, then you need to select Samsung Int. LTE Variants.
Now just tap on the Backup option to start the process.
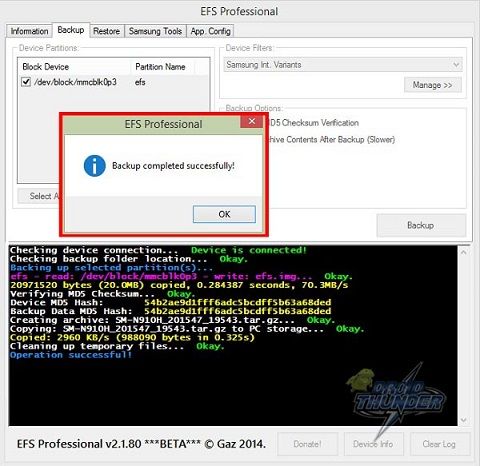
After a minute, the backup process will complete with a successful message displaying on the screen.
The backed-up EFS file (.tar.gz) will be saved in the EFS Professional\EFSProBackup folder. The same file will also be saved in your phones internal storage under the EFSProBackup folder.
Steps to restore EFS
In EFS Professional tool, click on the Restore tab. From the drop-down menu in Restore options, select the backed up file. Click on the Restore option to initiate the process. Finally! You’ve successfully backed up and restored EFS data using EFS Professional Tool. Now you can check your device IMEI number by typing *#06# on the phones dial pad.
Method 2: Using Terminal Emulator App
In this method, we’ll use an Android app to backup the IMEI number. Let’s start it!
Downloads
Terminal Emulator
Steps to backup EFS
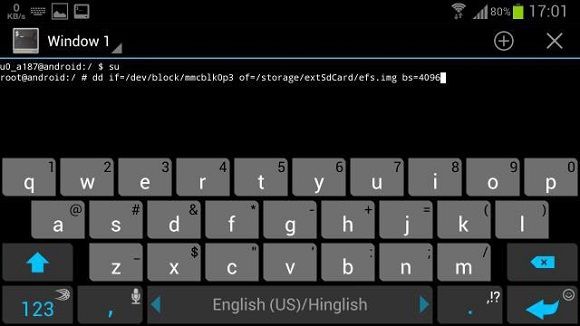
Download and install the Terminal emulator app on your phone. Launch the App. Type this command in it and press enter:
su
As soon as you hit enter, a window to grant superuser permissions will popup. So allow it. On the next line type either of the two commands and press enter: To backup EFS on internal storage:
dd if=/dev/block/mmcblk0p3 of=/storage/sdcard/efs.img bs=4096
To backup EFS on external SD card:
dd if=/dev/block/mmcblk0p3 of=/storage/extSdCard/efs.img bs=4096
This command will create an efs.img file on your phone internal/external storage. Copy this file on your computer for more safety.
All the commands are case sensitive so type each command line carefully.
Steps to restore EFS
Launch the Terminal Emulator app and type these commands in it.
su
On the next line, type either of these commands and press enter: To restore EFS on internal storage:
dd if=/storage/sdcard/efs.img of=/dev/block/mmcblk0p3 bs=4096
To restore EFS on external SD card:
dd if=/storage/extSdCard/efs.img of=/dev/block/mmcblk0p3 bs=4096
If this Terminal Emulator method does not work for you, it might be due to the location of the EFS partition on your device. To fix this try these steps: Download and install the Root browser app on your phone. Launch it and go to the dev/block directory and note down the exact path of EFS data files. Now edit the file path in the command line accordingly:
dd if=/dev/block/mmcblk0p3 of=/storage/sdcard/efs.img bs=4096
Finally! You’ve successfully backed up and restored EFS / IMEI using the Terminal Emulator app.
Method 3: Using Custom recovery
Here, we’ll use TWRP custom recovery to backup the IMEI number.
Requirements
Steps to backup EFS
Boot into TWRP custom recovery. Select the Backup option. Select the partitions including EFS to backup and swipe to start the backup process.
Steps to restore EFS
It is similar to the backup process just click the Restore option and select a saved backup file. Finally! You’ve successfully backed up and restored EFS/IMEI using custom recovery.
Method 4: Using Script
Here, we’ll use a script file on your Windows PC to backup the IMEI number.
Downloads
EFS backup.zip script
Steps to backup EFS
Download and extract the zip file on your computer.
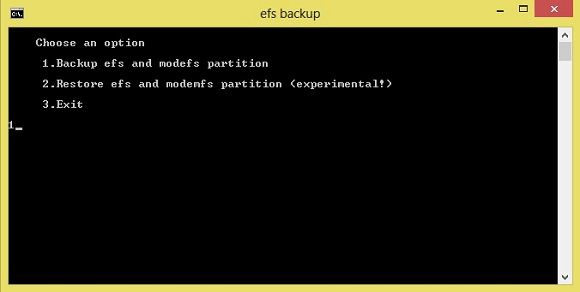
Connect your phone to the computer using a USB cable. On PC, open the Start.bat file from the extracted folder. A black window will appear on your screen. To backup EFS, type 1 and hit the enter key.
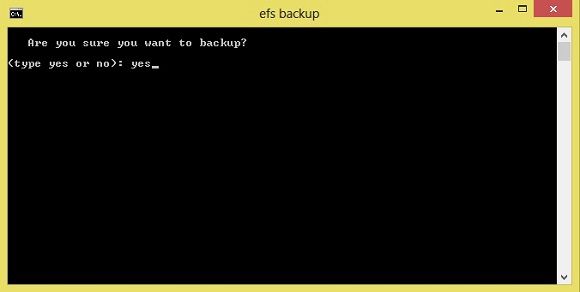
On the next screen, type yes to start the backup process.
The EFS backup file will be created in the EFS backup/backup folder.
Steps to restore EFS
It is similar to the backup process just select the Restore option and then select the saved backup file. Finally! You’ve successfully backed up and restored EFS / IMEI using Script.
Method 5: Using Aroma Installer
In this method, we’ll use an aroma installer to backup the IMEI number.
Requirements
Downloads
EFS_backup_Restore_Aroma.zip
Steps to backup EFS
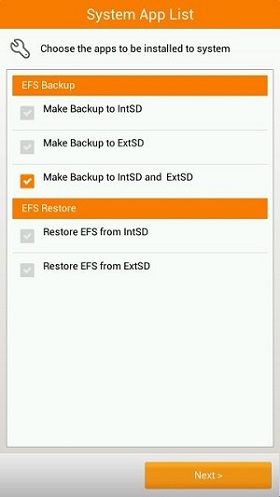
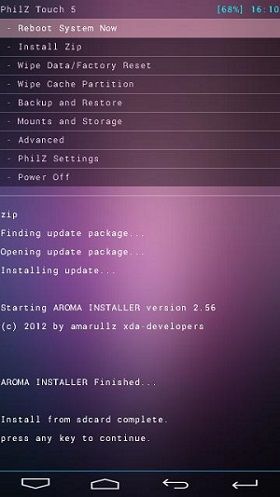
Download and copy the EFS_backup_Restore_Aroma.zip file on your phone. Do not extract it. Boot your phone into recovery mode. Select the Install Zip option. On the next screen, select the Choose zip from sd card option. Navigate to the EFS_backup_Restore_Aroma.zip file and select it. Moreover, the next screen you will have is the Aroma installer. You may backup EFS on either internal or external storage. Here I’ll take backup on both the storage.
Click the Next option to start the EFS backup process. It’ll take a minute to complete.
Return to recovery mode and select the Reboot system now option to restart the phone.
Steps to restore EFS
It is similar to the backup process just select the Restore option from Aroma Installer and select the saved backup file. Finally! You’ve successfully backed up and restored EFS / IMEI using Aroma Installer.
Method 6: Using Samsung Tool
The Samsung Tool app is one of the easiest ways to take backup of EFS partition. This app is developed by recognized developer Ricky Divjakovski from the XDA community.
Downloads
Samsung Tool app
Steps to backup EFS
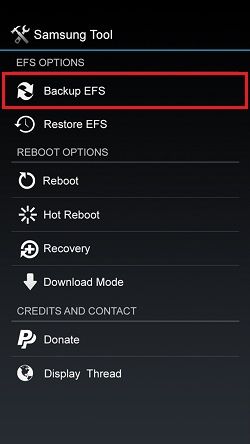
Download and install the Samsung Tool app on your phone. Open it and click on the Backup EFS option.
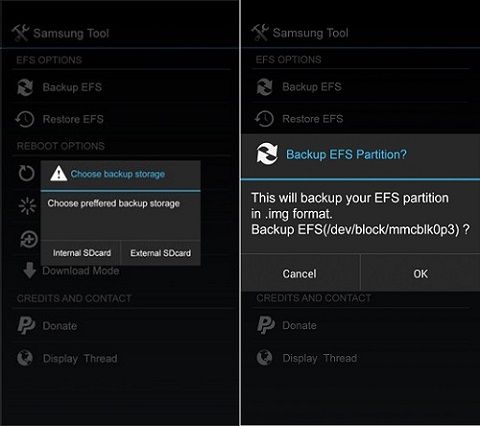
Select the location of the backup process and click OK to start the EFS backup process.
This will create a backup of EFS in internal/external storage on your phone.
Steps to restore EFS
It is similar to the backup process just select the Restore EFS option and then select the saved backup file. Finally! You’ve successfully backed up and restored EFS / IMEI using Samsung Tool.
Method 7: Using SA Manager App
Here, we’ll use an Android app called SA Manager to backup your IMEI number.
Downloads
SA Manager App
Steps to backup EFS
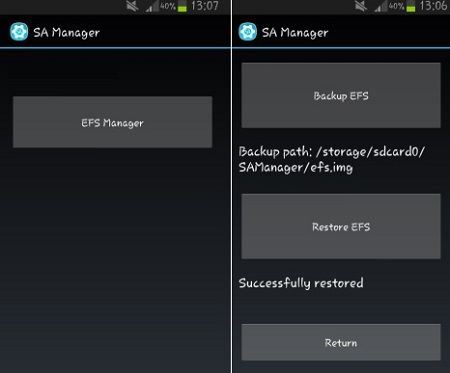
Download and install SAManager App on your phone. Launch it and click on the EFS Manager option. Furthermore, on the next screen select the Backup EFS option.
This will start the EFS backup process.
Steps to restore EFS
It is similar to the backup process just select the Restore option and then select the saved backup file. Finally! You’ve successfully backed up and restored EFS / IMEI using SAManager App.
Method 8: Using Andromizer App
In this method, we’ll use the Andromizer application to backup your IMEI number. Let’s get straight into it.
Downloads
Andromizer App
Steps to backup EFS
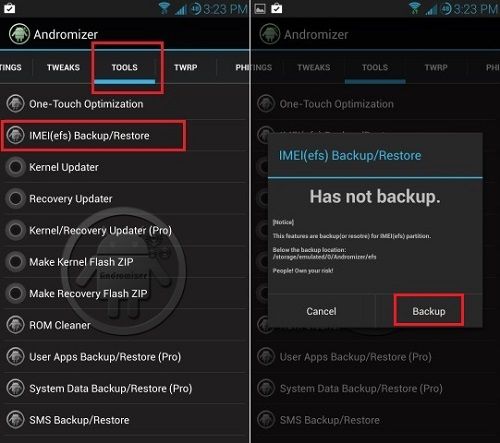
Download and install Andromizer App on your phone. Launch it. Then go to the Tools tab and select IMEI (efs) Backup/Restore option. Moreover, on the next screen select the Backup option to start the EFS backup process.
This EFS backup file will be saved in the Andromizer folder.
Steps to restore EFS
It is similar to the backup process just select the Restore option and then select the saved backup file. Finally! You’ve successfully backed up and restored EFS / IMEI using SAManager App.
Method 9: Using Mobile Uncle App
Here, we’ll use an Android app called Mobile Uncle to backup your IMEI number.
Downloads
Mobile Uncle App
Steps to backup EFS
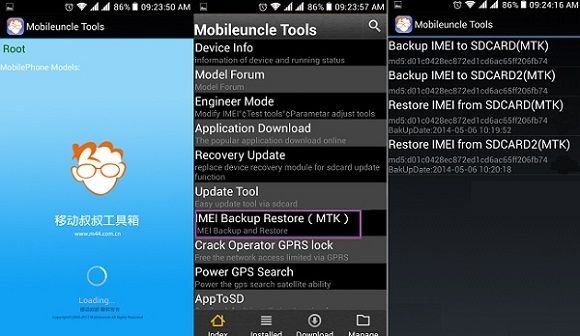
Download and install the Mobile Uncle app on your phone. Launch it. Then click on the IMEI Backup Restore option. Furthermore, on the next screen select Backup IMEI to SD card option.
This will start the EFS backup process.
Steps to restore EFS
It is similar to the backup process just select the Restore option and then select the saved backup file. Finally! You’ve successfully backed up and restored EFS / IMEI using Mobile Uncle App.
Method 10: Using Ktool
This is another handy tool to backup EFS / IMEI. This tool supports all Samsung phones except Qualcomm based LTE devices.
Downloads
HC-KTool
Steps to backup EFS
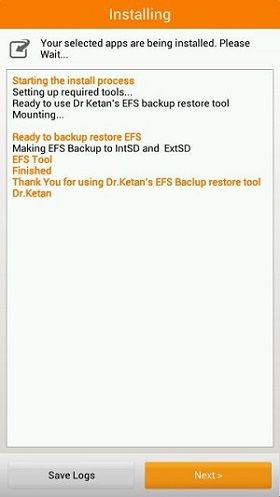
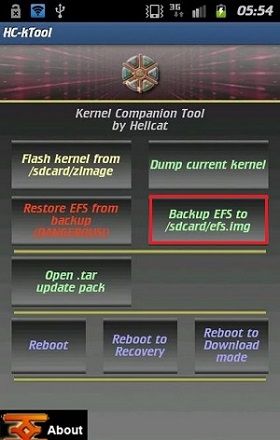
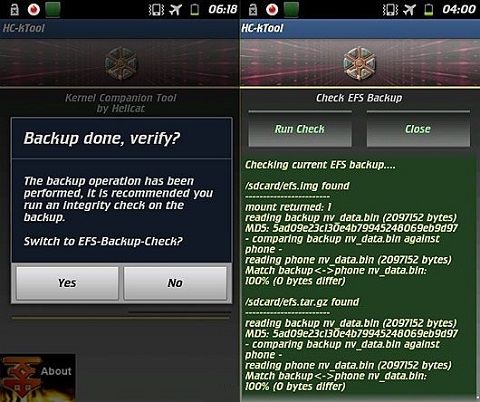
Download and install the HC-KTool app on your phone. Launch it. Moreover, click on the Backup EFS option.
This will start the EFS backup process. After completion of the process, you may run the EFS backup check.
Steps to restore EFS
Launch the app and select the Restore EFS option. Select the saved img/tar EFS file you want to restore. Finally! You’ve successfully backed up and restored EFS / IMEI using KTool.
Conclusion
Finally! This is how you can backup and restore EFS/IMEI data. If you come across any difficulty, then do comment below. Thank you! Notify me of follow-up comments by email. Notify me of new posts by email.
Δ Please Help 🙁 System System image Data Cache Persist Boot Recovery. Snapdragon 653. Phone is not rooted.